.png?w=970&h=250)
How to Reduce Embroidery Cost Without Sacrificing Quality: A Factory Insider's Guide
What It Really Means

Where Embroidery Costs Actually Come From
Most buyers I work with come in focused on one number: the per-yard price. I get it. It's the easiest thing to compare across quotes. But it's also the reason some buyers end up spending more than they planned. If you haven't already, I'd recommend reading our breakdown of the 5 key factors that determine embroidery fabric price — it gives context for what I'm about to explain.
The per-yard price is maybe 40% of what you actually pay for embroidery. The rest is made up of decisions you make before production even starts — and a few you don't realize you're making.
I've been in this business long enough to see the same pattern over and over. A buyer gets three quotes, picks the cheapest one, and then spends the next six months dealing with rework, delays, and quality complaints from their own customers. The "expensive" quote from the supplier who asked more questions upfront? That one would have cost less in total.
Let me break down where embroidery costs actually come from, so you can make decisions based on the full picture, not just the headline number.
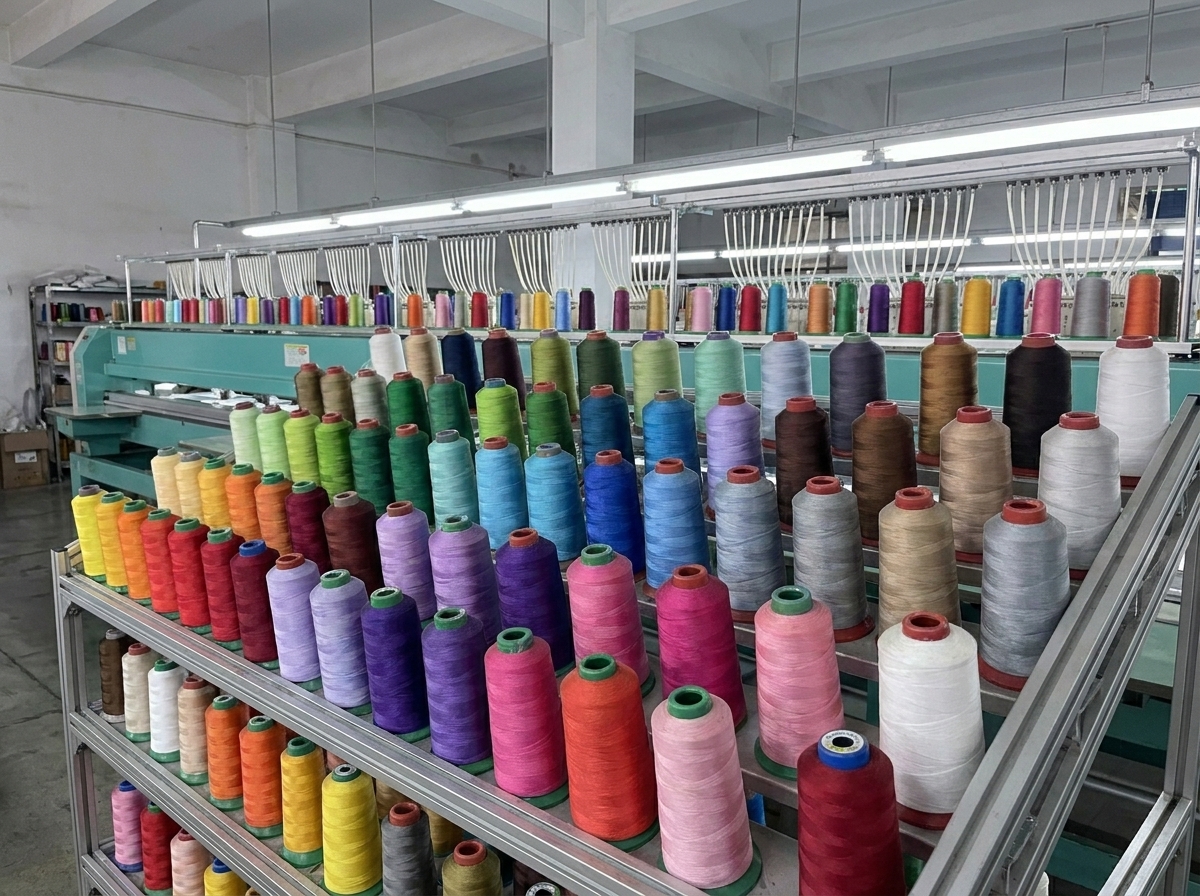
Raw Materials — Thread, Fabric, and Stabilizers
This is the part most buyers underestimate. Thread isn't just thread. There are quality tiers, and the difference between the cheapest and a solid mid-range option is maybe 5-8% of your material cost. But the difference in how it runs on the machine? That's where the real savings show up.
Cheap thread breaks more often. Every break means the machine stops, a technician resets, and you lose production time. On a 62-head machine, a single thread break doesn't just cost you one stitch — it can hold up 62 garments or meters of fabric while someone fixes it.
Fabric selection matters just as much. Embroidery-friendly fabrics — tightly woven, stable, with good surface tension — run faster and produce fewer defects. If your fabric is too stretchy or too loose, we need additional stabilizers, which adds cost and production steps. We've had orders where switching from a cheap, loose-weave base fabric to a slightly more expensive but stable one actually reduced the total embroidery cost by 12%, because we could run the machines faster with less waste.
Stabilizers are the hidden variable. Cut-away stabilizers give the best support but cost more and add a production step. Wash-away stabilizers are great for certain applications (like water-soluble embroidery) but have their own cost profile. Tear-away is cheapest but doesn't work for every design. The right choice depends on your end use, not just your budget.
Design Complexity — Stitch Count, Colors, and Density
This is where your design decisions directly translate to cost. Every stitch takes time and thread. More stitches = more machine time = higher cost. It's not complicated math, but the implications are worth understanding.
A standard left-chest logo might be 5,000-8,000 stitches. A full-back design? 15,000-25,000 stitches. That's roughly 3x the machine time and thread consumption for the same garment. If your design doesn't need that complexity, you're paying for aesthetics that your end customer may not even notice.
Color changes are the other lever. Each color change requires thread switching, tension adjustment, and quality verification. In our factory, we standardize on 6-needle machines, which means most designs with 6 or fewer colors run efficiently. Every color beyond that adds setup time and potential for error.
Density is the third factor, and it's the one most buyers don't think about. Higher stitch density means more thread per square inch, more machine time, and a stiffer finished product. For some applications (like logos on structured garments), that's fine. For others (like embroidery on lightweight or stretch fabrics), it can actually cause puckering or distortion — which means rework.
Production Setup — Digitizing, Sampling, and Machine Setup
Digitizing is the process of converting your artwork into a file the embroidery machine can read. It's a one-time cost, usually $20-$150 depending on complexity. Most buyers treat this as an expense to minimize. I'd argue it's the single most important investment in your entire order.
A good digitizing file accounts for the fabric you're using, the stitch types that will look best, and the sequence that minimizes thread changes and jump stitches. A bad one? It produces a design that looks fine on screen but puckers, gaps, or falls apart on the actual fabric. And fixing it after production starts is expensive.
Sampling is another cost that buyers sometimes try to skip. I understand the logic — you've approved the digital file, why make a physical sample? Because what looks right on a computer screen doesn't always look right on actual fabric at actual size. We've caught design issues at the sampling stage that would have cost thousands to fix in a 50,000-meter production run.
Machine setup and calibration add time at the start of every production run. For standard designs, this is minimal. For complex, multi-color designs on difficult fabrics, it can take a full day. That time is built into your price, whether you see it as a line item or not.
5 Ways to Reduce Embroidery Cost Intelligently
Now that you know where the money goes, here's how to spend less of it — without ending up with a product you can't sell.
1. Optimize Your Design Before Production Starts
This is the single highest-impact thing you can do. Most embroidery designs can be simplified without visible quality loss.
Start with stitch density. If your digitizer set the fill stitch density at 0.4mm, ask if 0.5mm would look nearly identical on the actual fabric. For most applications, it will — and that 20% reduction in density means 20% less thread and 20% less machine time.
Next, look at your color palette. Do you really need 8 colors, or would 5 produce the same visual effect? Every color you eliminate saves setup time and reduces the chance of color-matching issues across a large production run.
Then look at detail. Tiny text, intricate gradients, and fine line work all require high stitch counts and precise execution. Sometimes simplifying these elements — making text slightly larger, using solid fills instead of gradients — produces a cleaner result at lower cost.
Our design team does this for every order. We have 10 people whose job is to look at your artwork and find ways to achieve the same visual result with fewer stitches, fewer colors, and fewer production problems. This isn't about cutting corners. It's about building efficiency into the design before we commit thread to fabric.
2. Plan Your Lead Time — Rush Is the Most Expensive Option
Rush orders cost 20-50% more than standard production. That's not markup — it's the real cost of disrupting a production schedule, expediting material sourcing, and running overtime.
Our standard lead time for embroidery fabric is 20-40 days, depending on complexity and volume. That breaks down to about 2-3 days for digitizing, 3-5 days for raw material sourcing, 1-2 days for setup, 5-15 days for production, 1-2 days for quality inspection, and 2-3 days for finishing and packing.
When a buyer calls and says "I need this in 10 days," we can sometimes make it happen. But it means rearranging our production schedule, potentially running machines on overtime, and expediting raw material delivery. All of that costs money, and it shows up in your quote.
The smartest buyers I work with plan 2-3 seasons ahead. They place orders during our slower periods, when we have more scheduling flexibility and can offer better terms. They get first pick of production slots and don't compete with the rush of buyers who all decided to order at the same time.
As Shawn, our founder, puts it: "The first to commit gets the first pick. Timing in wholesale isn't about being first. It's about being early enough that you still have choices."
3. Consolidate Orders Across Seasons
If you're ordering embroidered fabric for spring and again for fall, combining those orders into a single production run can save you 10-20% on per-unit costs. The reason is setup efficiency — every new production run requires machine setup, thread loading, and quality verification. Spread that setup cost over 60,000 meters instead of 30,000, and the per-meter cost drops.
This requires planning, obviously. You need to know your designs and quantities further in advance. But for brands with predictable seasonal patterns, the savings are significant.
We have clients who place consolidated orders for 3-6 months of production at once. They get priority scheduling, better pricing, and the confidence that their supply is locked in. It's not for everyone — if your designs change frequently or you're testing new markets, smaller runs make sense. But if you have established patterns, consolidation is one of the most effective cost levers available.
Our capacity supports this approach. With 27 embroidery machines running 62 heads each, we produce around 300,000 meters per month. That scale means we can handle large consolidated orders without the bottlenecks that smaller factories face.
4. Choose the Right Embroidery Technique for Your Budget
Not all embroidery techniques cost the same, and the cheapest option isn't always the best value. Here's how the main techniques compare in terms of cost and what you get for your money. (For a detailed comparison of mesh, crochet, and chemical lace, see our wholesale guide to choosing the right lace type.)
Mesh embroidery is the most cost-effective option for most applications. It uses a standard mesh base fabric, runs efficiently on multi-head machines, and produces consistent results at scale. For buyers who need volume and reliability, this is usually the right starting point.
Crochet lace offers a more textured, three-dimensional look. It's more labor-intensive and runs slower on the machine, so it costs more per yard. But for products where that hand-crafted aesthetic matters to your end customer, the premium is justified.
Water-soluble embroidery produces that premium, floating-lace effect that high-end brands love. It costs about 30-40% more than mesh embroidery because the base fabric is dissolved after production, leaving only the embroidery. (We cover water-soluble embroidery production in detail here.) The process is more complex, the yield is lower, and the raw material cost is higher. But the result is a product that commands a higher retail price.
Chemical lace falls somewhere between mesh and water-soluble in terms of cost and effect. It uses a chemical process to burn away the base fabric around the embroidery pattern, leaving a clean lace edge. The result looks similar to water-soluble lace but the production process is slightly different, and the cost lands in the middle.
The key question isn't "which is cheapest?" It's "which technique gives my product the best value proposition?" A water-soluble embroidered lace that retails for 3x the price of a mesh version is a better investment, even though it costs 30-40% more to produce.
5. Invest in Quality Upfront to Save Downstream
This is where I see the most expensive mistakes. They choose the supplier with the lowest per-yard price, skip the detailed quality specifications, and then spend months dealing with the consequences.
Our defect rate is under 2%. That number isn't an accident — it's the result of a 6-checkpoint quality inspection system that runs from raw material intake through final packing. Every roll of incoming fabric is inspected for width consistency, weaving defects, color variation, and weight. About 15% of digitizing files are sent back for revision before production starts. First-article approval requires 3-5 samples signed off by the client. During production, we monitor thread breakage rates, tension calibration, and pattern alignment. Before shipping, every meter goes through needle detection and dual-light color verification.
That level of quality control costs money. It's built into our per-yard price. But compare that to a factory with a 5-8% defect rate: their per-yard price might be 10% lower, but after you account for rejected goods, rework, delayed shipments, and the damage to your own brand reputation, the "cheaper" option costs significantly more.
Shawn has a saying that I think about every time a buyer pushes back on our pricing: "Quality is not a cost. It's an investment. The first thing I learned as a quality inspector was that rework is the real waste."
If you're evaluating suppliers, ask about defect rates, ask about their inspection process, and ask for references from existing clients. The answers will tell you more about your true cost than the per-yard number on the quote.

What a Fair Embroidery Price Actually Includes
When you get a quote for embroidered fabric, here's what's in that number — and what should be.
Raw materials: Thread, base fabric, stabilizers, and any specialty materials (sequins, beads, etc.). This is typically 35-45% of the total cost.
Production labor: Machine operation, setup, monitoring, and adjustments. This runs 20-30% of cost, depending on complexity.
Quality control: Inspection at multiple stages, testing, and defect management. Responsible factories build this into the price. Others don't — and you pay for it later.
Overhead and margin: Factory maintenance, equipment depreciation, energy, and the supplier's profit. This is 15-25% of cost.
What's NOT in a suspiciously low quote: Adequate quality inspection. Proper raw materials. Fair wages for production staff. Contingency for production issues that come with complex embroidery.
If a quote is 20% lower than everyone else's, ask yourself: which of those cost components did they cut? It's usually quality control or material quality. Those are the two that have the most impact on your finished product.
I'm not saying the most expensive quote is always the best. I'm saying you should understand what you're comparing. Two quotes that look different on paper might be offering very different things.
FAQ
What is the cheapest embroidery technique for bulk orders?
Mesh embroidery on standard base fabric is typically the most cost-effective option for large-volume orders. It runs efficiently on multi-head machines, uses readily available materials, and produces consistent results. For orders above 10,000 yards, mesh embroidery can be 30-40% less expensive per yard than water-soluble or specialty techniques.
How much can I save by optimizing my embroidery design?
Design optimization typically saves 15-30% on per-unit embroidery costs. The biggest savings come from reducing stitch density (which cuts thread and machine time), consolidating colors (which reduces setup time), and simplifying intricate details that require high stitch counts. Our design team routinely helps buyers achieve these savings without visible quality loss.
Does ordering from China really save money on embroidery?
For wholesale volumes, yes — but the savings come from more than just lower labor costs. Chinese embroidery factories like ours offer scale (we run 27 machines with 62 heads each), integrated supply chains for raw materials, and established export logistics. The key is choosing a supplier with proper quality controls and compliance certifications. A factory with a 5% defect rate and no OEKO-TEX certification isn't saving you money — it's creating problems that cost more to fix.
How does fabric quality affect embroidery cost?
Fabric quality directly affects production speed, defect rates, and stabilizer requirements. A stable, tightly woven fabric runs faster on embroidery machines, produces fewer defects, and often requires less stabilizer. In our experience, upgrading from a cheap, loose-weave base fabric to a quality embroidery-grade fabric can reduce total embroidery cost by 8-12% through improved production efficiency, even though the fabric itself costs more per yard.
How Fominte Helps You Spend Less Without Getting Less
I've been in this business long enough to know that the cheapest supplier and the best value supplier are rarely the same company.
At Fominte, our approach to cost optimization is different from what you'll find at most factories. We don't compete on the lowest per-yard price. We compete on the lowest total cost of ownership — and that means helping you make better decisions at every stage of the process.
Our raw material sourcing advantage is something we've spent 35 years building. We source thread, fabric, and specialty materials directly, which means lower material costs that we pass through to our clients. We don't mark up materials the way trading companies do.
Our design team of 10 people reviews every order before production starts. They look for opportunities to optimize your design — reducing unnecessary stitch density, consolidating colors, simplifying production. This isn't an upsell. It's standard practice for us, because a design that runs efficiently on our machines is better for both of us.
Our production capacity gives us scheduling flexibility that smaller factories can't match. With 27 machines producing 300,000 meters per month, we can offer better pricing on consolidated orders and don't need to charge rush premiums as often.
And our quality system — 6 inspection checkpoints, under 2% defect rate, OEKO-TEX and Higg Index certifications — means you're not paying for problems downstream.
If you're evaluating your embroidery costs for the next season, send your specs to info@fominte.com. We'll give you an honest breakdown of where your money goes — and where you can save. No pressure, no hidden costs. Just the information you need to make a good decision.
Step-by-Step Guide
Optimize Your Design
Plan Your Lead Time
Consolidate Orders
Choose the Right Technique
When to Use & Avoid
Mesh embroidery
✅ Use When
- High-volume orders, consistent designs, cost-sensitive products, uniform programs
⚠️ Avoid When
- Products requiring premium hand-crafted aesthetic
Crochet lace
✅ Use When
- Textured designs, bohemian or artisan brands, products where 3D texture adds value
⚠️ Avoid When
- High-volume cost-sensitive orders
Water-soluble embroidery
✅ Use When
- Premium brands, lace products, high-end retail, products where floating effect justifies cost premium
⚠️ Avoid When
- Budget-conscious bulk orders
Chemical lace
✅ Use When
- Mid-range lace products, designs needing clean lace edges, moderate volume orders
⚠️ Avoid When
- Products requiring the most premium finish
Comparison
| Technique | Cost vs. Mesh | Best For | Key Trade-off |
| Mesh embroidery | Baseline (lowest) | High-volume orders, uniforms, cost-sensitive products | Standard look, limited texture |
| Crochet lace | +15-25% | Artisan brands, textured designs, bohemian aesthetic | Slower production, higher labor |
| Water-soluble embroidery | +30-40% | Premium lace products, high-end retail, floating effect | Higher material cost, more complex process |
| Chemical lace | +10-20% | Mid-range lace, clean edges, moderate volume | Chemical process, environmental considerations |
⚡ Common Mistakes to Avoid
Everything You Need to Know
Conclusion